
GET THE LOOK | 3 Easy Looks with Joe Fresh’s Five Minute Face Palette @JoeFreshStyle
Yes, so like I admitted in the previous post – these looks take me more than five minutes to achieve on their own…but once…
 journal + journey of a make-up + hair artist, and the beautiful things encountered along the way
Yes, so like I admitted in the previous post – these looks take me more than five minutes to achieve on their own…but once…

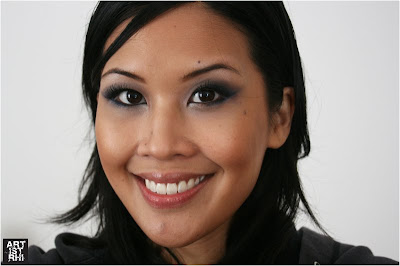
See a bridal beauty breakdown of Tu-Le’s eye make-up after the jump!
CONTEST ALERT!Marcelle Cosmetics is offering one very lucky artistrhi reader the chance to literally GET THE LOOK with their Fall 2009 Ultra Glam collection!…
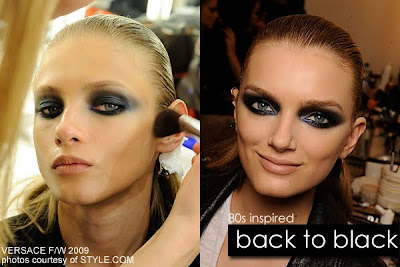
With celebs like Lady Gaga dominating major fashion magazine covers and high fashion designers steering the style masses, it’s no surprise that the decadent…

The “no make-up” look actually takes a little effort to achieve, but the results are simple and stunning. To get Kristine’s natural flawless finish,…